How-To Tutorials: How to Install Your Own Retaining Wall
Introduction
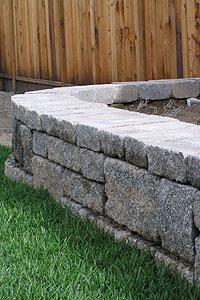
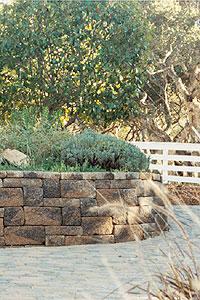
How to Install Your Own Retaining Wall.Installing Retaining Walls is a relatively easy way to reinforce and beautify your home and yard. These retaining walls are durable and possess old world charm. Proper preparation and installation can ensure your enjoyment and security as well as a long-term addition to the attractiveness of your home and landscape. Follow these easy steps or contact your friendly expert at Graniterock to create a beautiful and long-lasting retaining wall.
Tools and Materials
- An example of tools and materials needed:
Ask the Experts
For more help on how to install your retaining wall, contact your local Graniterock branch!
Find a location near you
Retaining Wall Links
CALSTONEALLAN BLOCK
McNEAR
A
Before You Begin
Walls that are three feet or less do not generally need reinforcement. If your wall exceeds three feet, you may need engineering assistance. Please contact a Graniterock Sales Representative for more assistance. Determine the length and height of your retaining wall and contact the experts at Graniterock to get help calculating your material needs. See "Tools & Materials" for more basic information.
Step 1
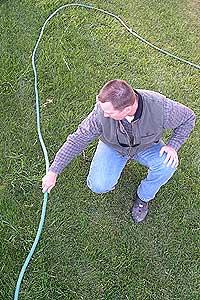
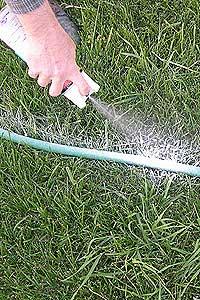
Site Preparation
Remove all the surface vegetation. This material should not be used as backfill. Use a string line or rubber hose to layout the trench location and mark with chalk, sand or marking paint.
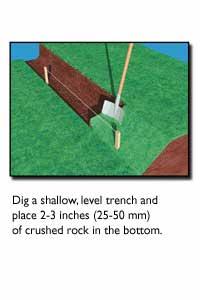
Step 2
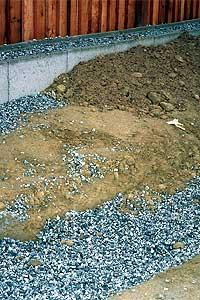
Excavation
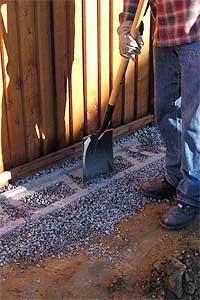
Excavate the base trench at the wall location. Make sure the base is level and to the proper depth. The trench should be one foot wide and a minimum of four inches deep in undisturbed soil. The depth of the trench should be one inch for each foot of wall height.

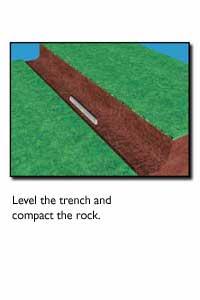
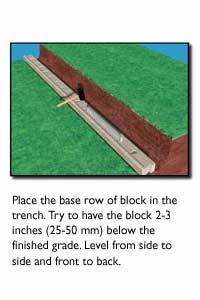
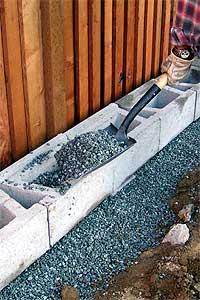
Step 3
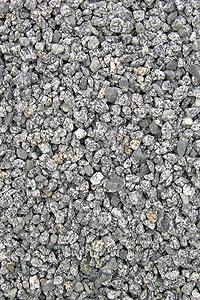
Base Installation
A base material of clean, compactable granular material should be used. Three to four inches of base material should be placed and compacted with a hand tamper or a mechanical vibratory plate compactor. Check for level. The depth of the trench should be one inch for every one foot of wall height.
Step 4
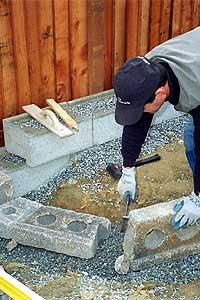
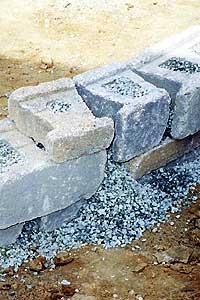
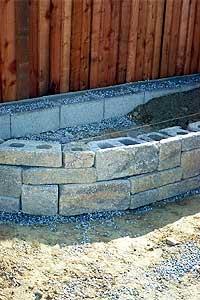
Course Installation
Begin at the lowest elevation. Check for level from front to back and side to side. Irregularities in the base become bigger as the wall stacks up. Minor adjustments may be made with a rubber mallet.
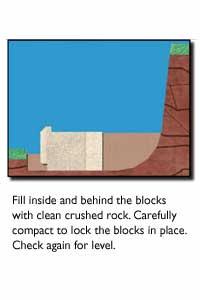
Step 5
Drainage Installation
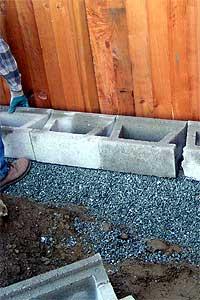
Fill the hollow blocks and the drain field behind the wall with a clean granular drain material. Do not use sand. Backfill and compact material behind the wall.
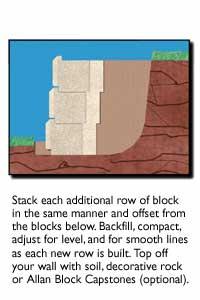
Step 6
Second Course
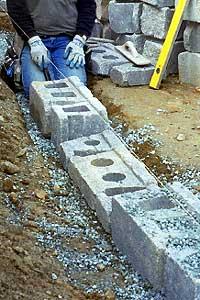
Remove excess drainage material. Stack the next row of blocks so that the seams are offset. Sight down the wall to check the straight lines, check for level and fill with material. Compact and clean.
Step 7
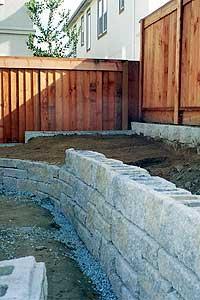
Additional Courses
Install additional courses following steps five, six and seven. Compact lifts in eight inch increments or less.Always check for level and fill with material as you go.
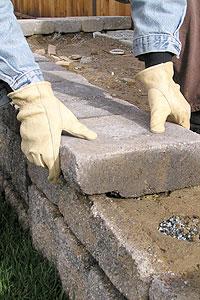
Step 8
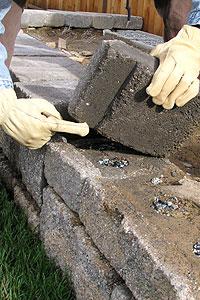
Cap Installation
Clean final course and install your caps for a finished and functional completion of your beautiful new retaining wall.
Step 9
Maintenance
Your new retaining wall requires little to no maintenance when installed properly. Wash as desired and enjoy.